Prepare Scene Settings for BatchX
The next step after preparing your 3d files, is to prepare the scene settings for the image/video render step. This includes setting HDR environment maps for metal and diamonds, setting up metal/diamond/enamel/pearl/... materials and their variations, camera views, post processing effects and more.
To prepare all the settings, you need to use the iJewel Playground, which is available to use for free. Following are the recommended steps to complete your scene settings.
1. Choosing the right HDR environment maps
This is perhaps the most critical part to give your gold, diamonds/gems, and other materials the desired look. You can either use one of our free presets, which are available for download OR create your own HDR environment maps from scratch.
Here are a couple of tutorials to go through the environment map setup for metal and diamonds.
TIP
Create environment maps from scratch using HDR Map Editor
To create your own environment maps from scratch, we recommend using the HDR Map Editor. This powerful tool allows you to create your own environment maps to exactly fit your needs. To understand the process in greater detail, go through the following playlist tutorials.
2. Create materials and material variations
To create variations of your desired gold(rose, yellow, white etc), diamonds(diamond, ruby, sapphire etc), pearls(black, white,...) etc, go through the following tutorial. In this step, you need to prepare all the different variations for your gold, diamond, pearl, and other materials. These variations will later be used by BatchX to auto generate media.
3. Create camera views
This step will define the different views for your products, so that BatchX can generate the media for each view automatically. Here is a tutorial on how to do that
4. Adjust scene settings
In this step you can make changes to background, ground, postprocessing and many more settings.
Go through the entire playlist tutorials to understand in greater detail about setting materials, background color,images, postprocessing effects and more
5. Export scene settings
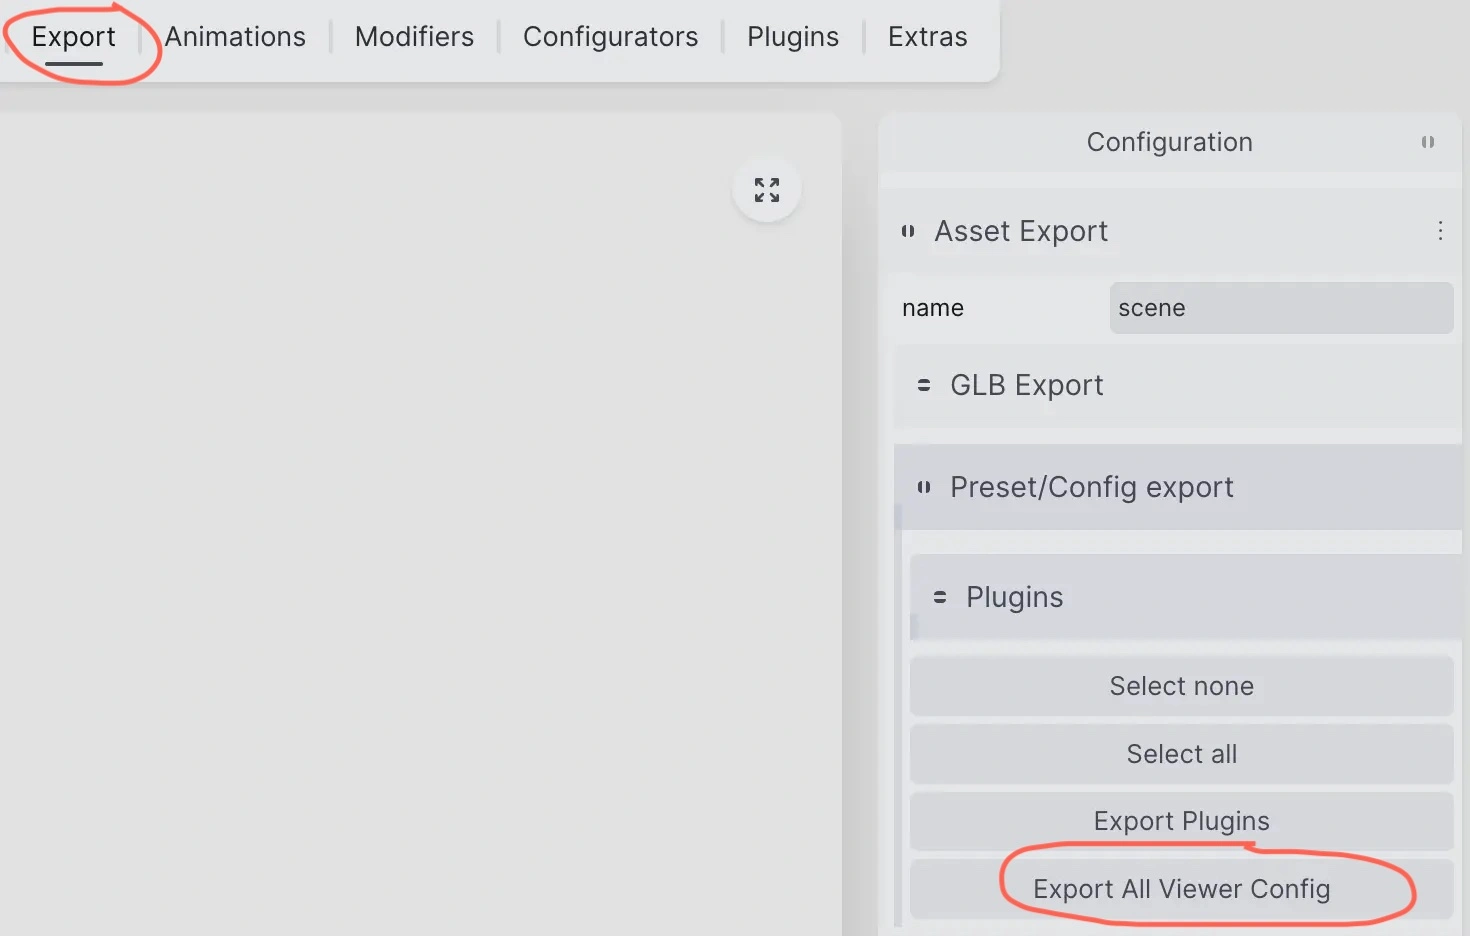
Now you are ready to export all your scene settings, and start using BatchX to generate media. You can export the scene settings by going to the Export tab.  this will download a json file with vjson file extension, which contains all the information about the settings you have made.
TIP
- For each product category like rings, earrings, braclet, you may need to create different scene settings.
- Standing and layed down rings might need different scene settings(mostly different camera views)
Most of the work is done now. In the next and final step, we will go through the simple process of generating images and videos using BatchX.