Embedding iJewel3D Viewer in Shopify

This guide outlines the process of integrating iJewel Embedding into Shopify using Dawn or related themes.
Prerequisites
Before proceeding, make sure you have:
- Access to your Shopify admin dashboard
- A 3D model embed URL from either iJewel.Design or iJewel Drive
- A backup of your current theme (recommended)
If you're unsure how to get your 3D model embedding URL, learn it from this guide: Embedding with iJewel
Step 1: Backup Your Shopify Theme
- Go to Online Store → Themes
- Click on Actions → Duplicate to create a backup
- Work only on the duplicate or current version with caution
Step 2: Create a new MetaField and set its value.
- Log in to your Shopify store admin dashboard
- Navigate to Settings which is In the bottom-left of the dashboard
- In the left sidebar of the Settings page, click on Metafields and metaobjects
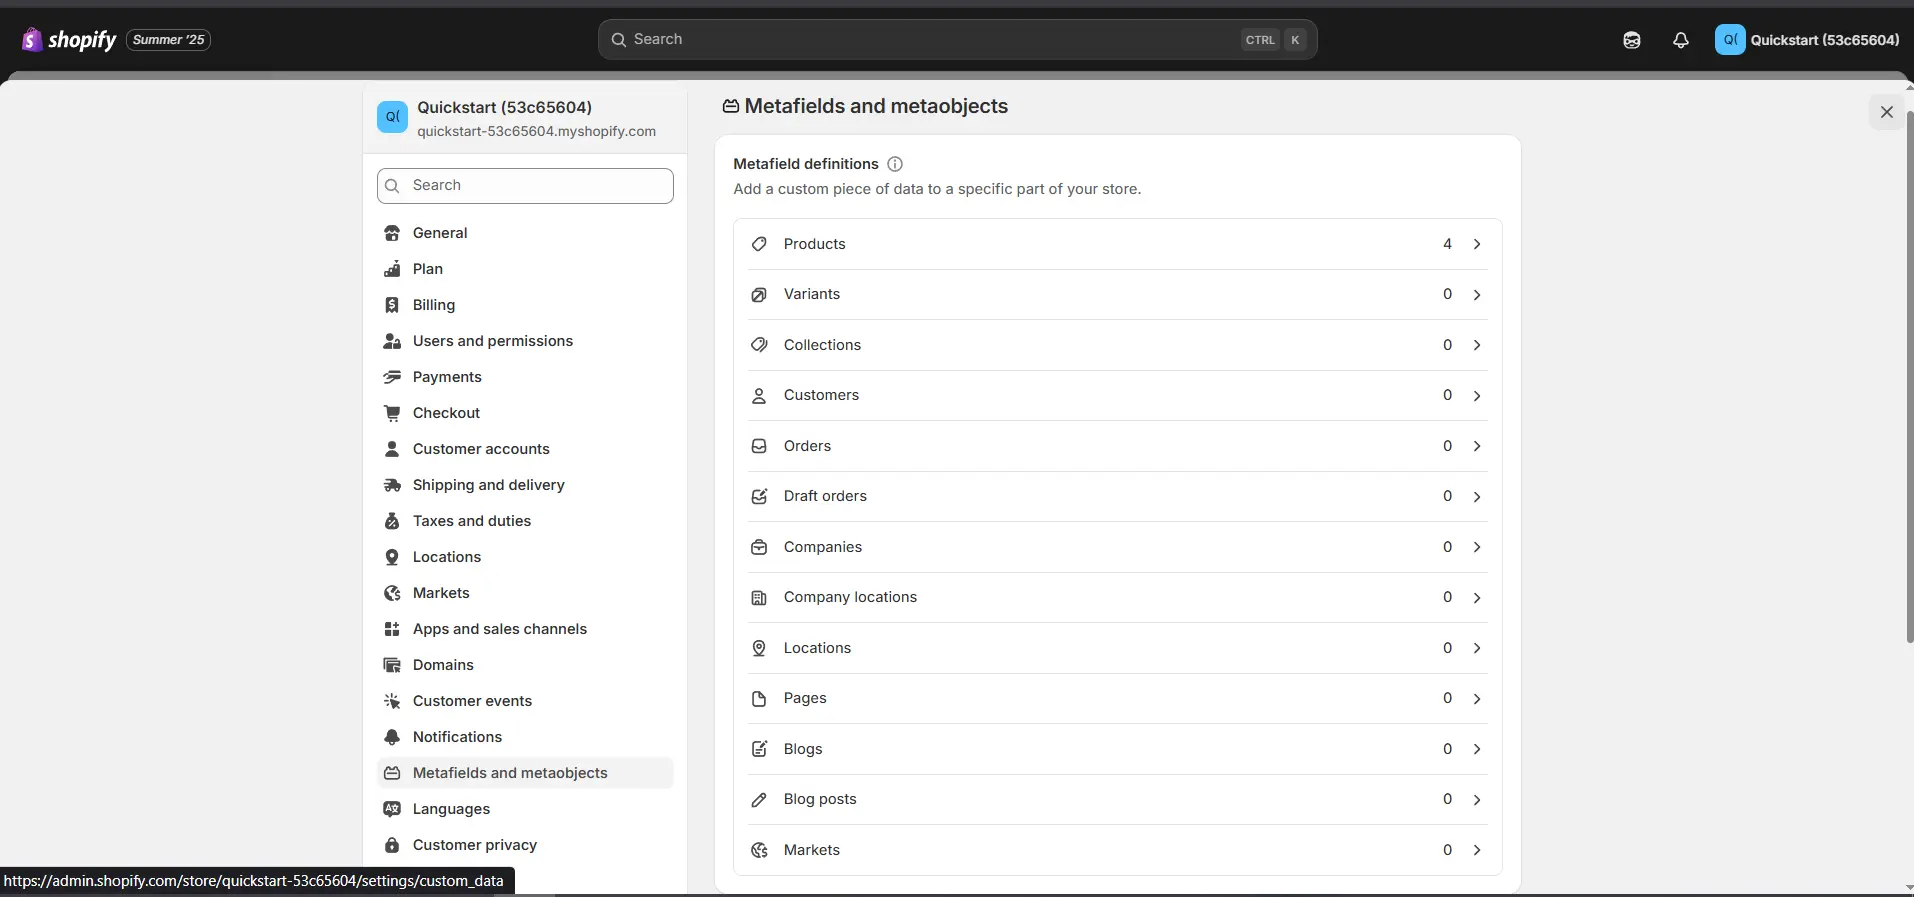
- From the list of resources you can customize, click on Products
- Click on Add Definition
- Fill the Metafield Definition as follows:
- Name: iJewel Embedding Model Source
- Namespace and Key:
custom.model_source_embed - Description: Source of embedding iframe from iJewel Playground
- Select Type: URL
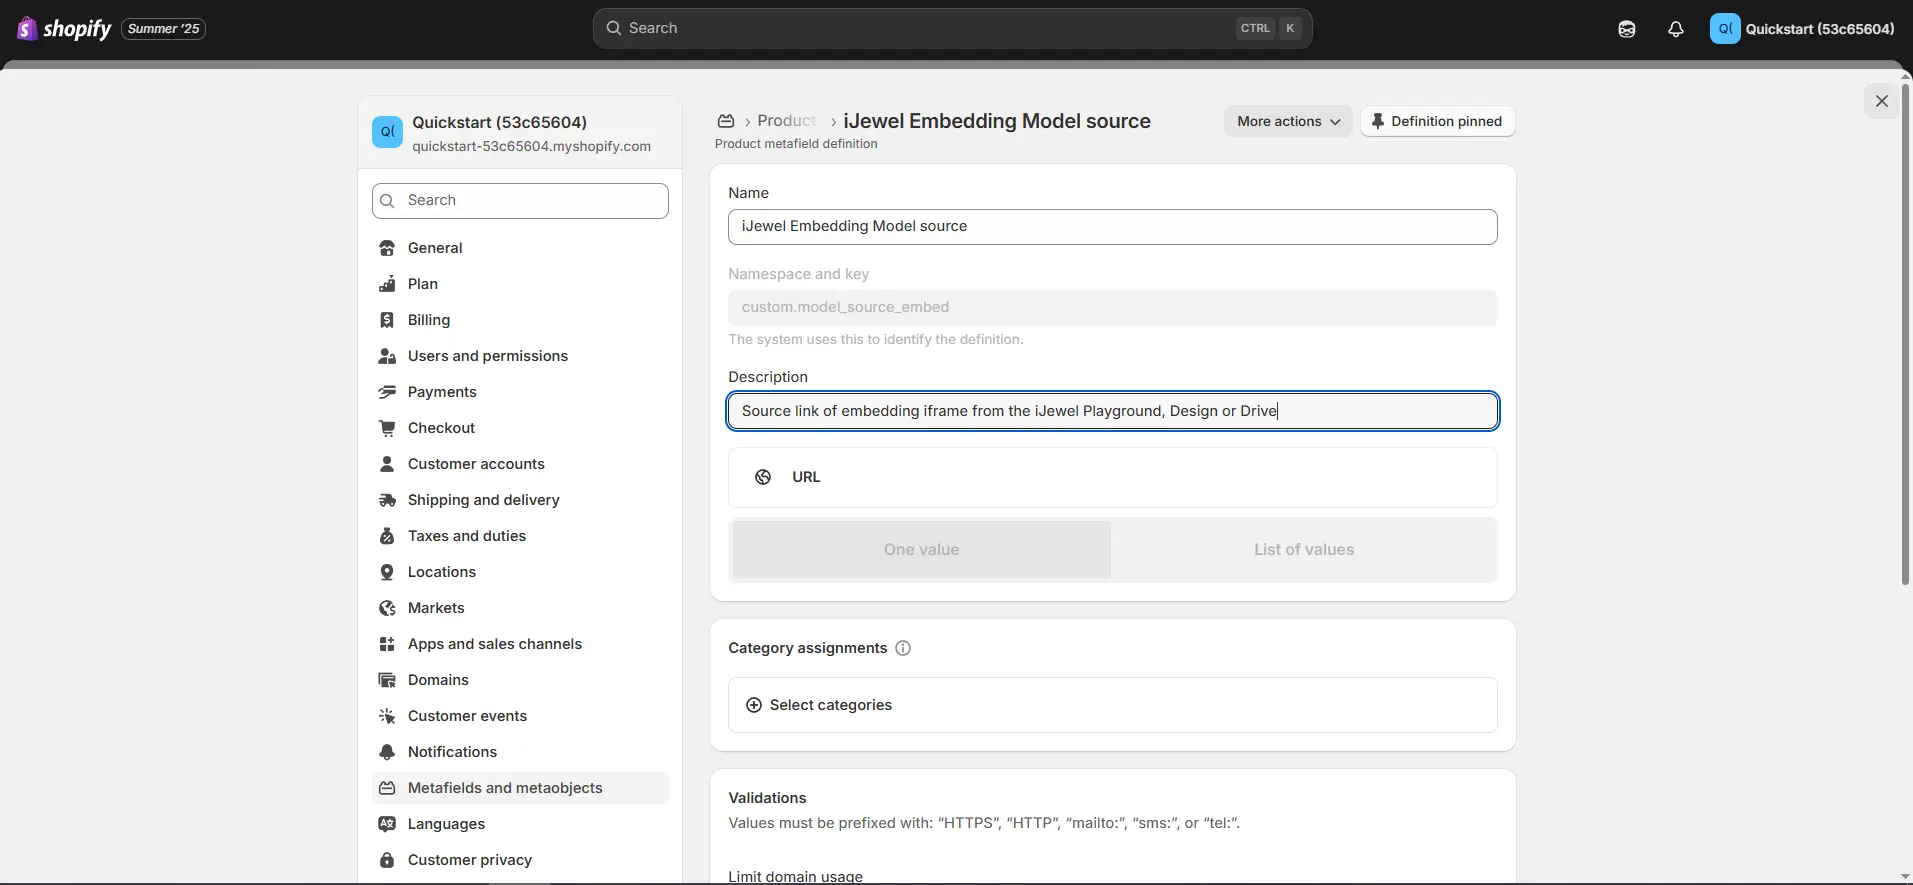
- Click on save
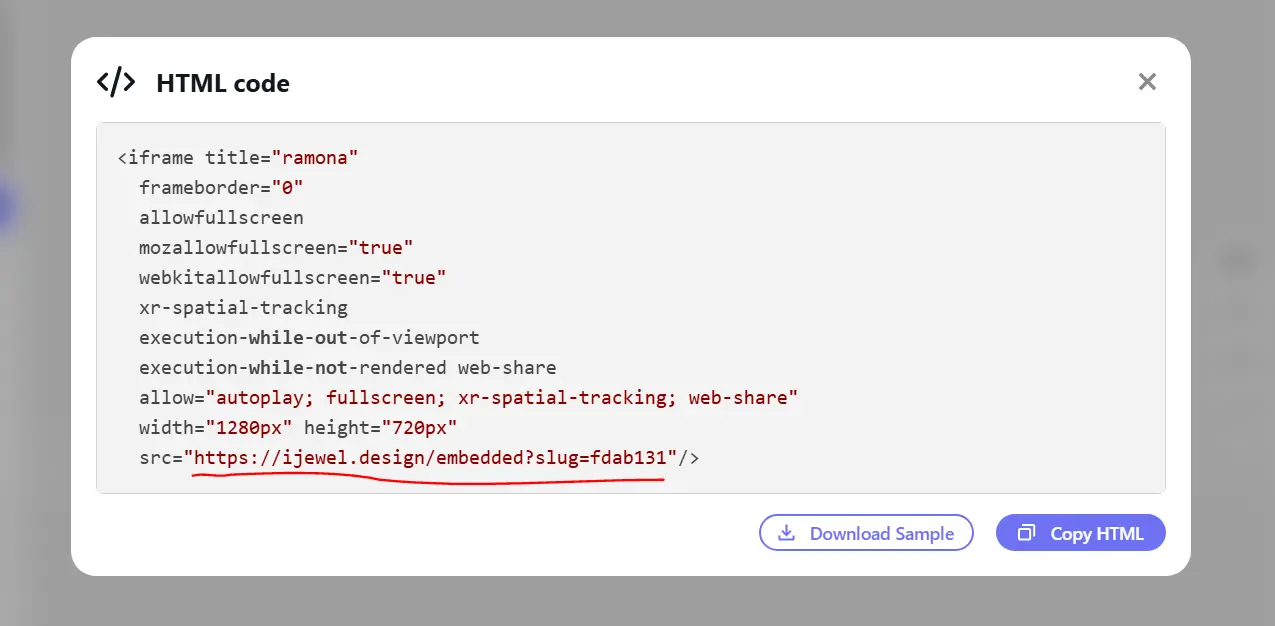
Step 3: Get the Model embed URL from PlayGround
Copy the link from src attribute of iframe which was obtained from Playground using either iJewel.Design or iJewel Drive. If you're unsure how to get your 3D model embedding URL, use this guide: Geting Embedding URL
- The src attribute in the embed URL will be used to map the model to it's corresponding product.
Step 4: Mapping src model URL with Product
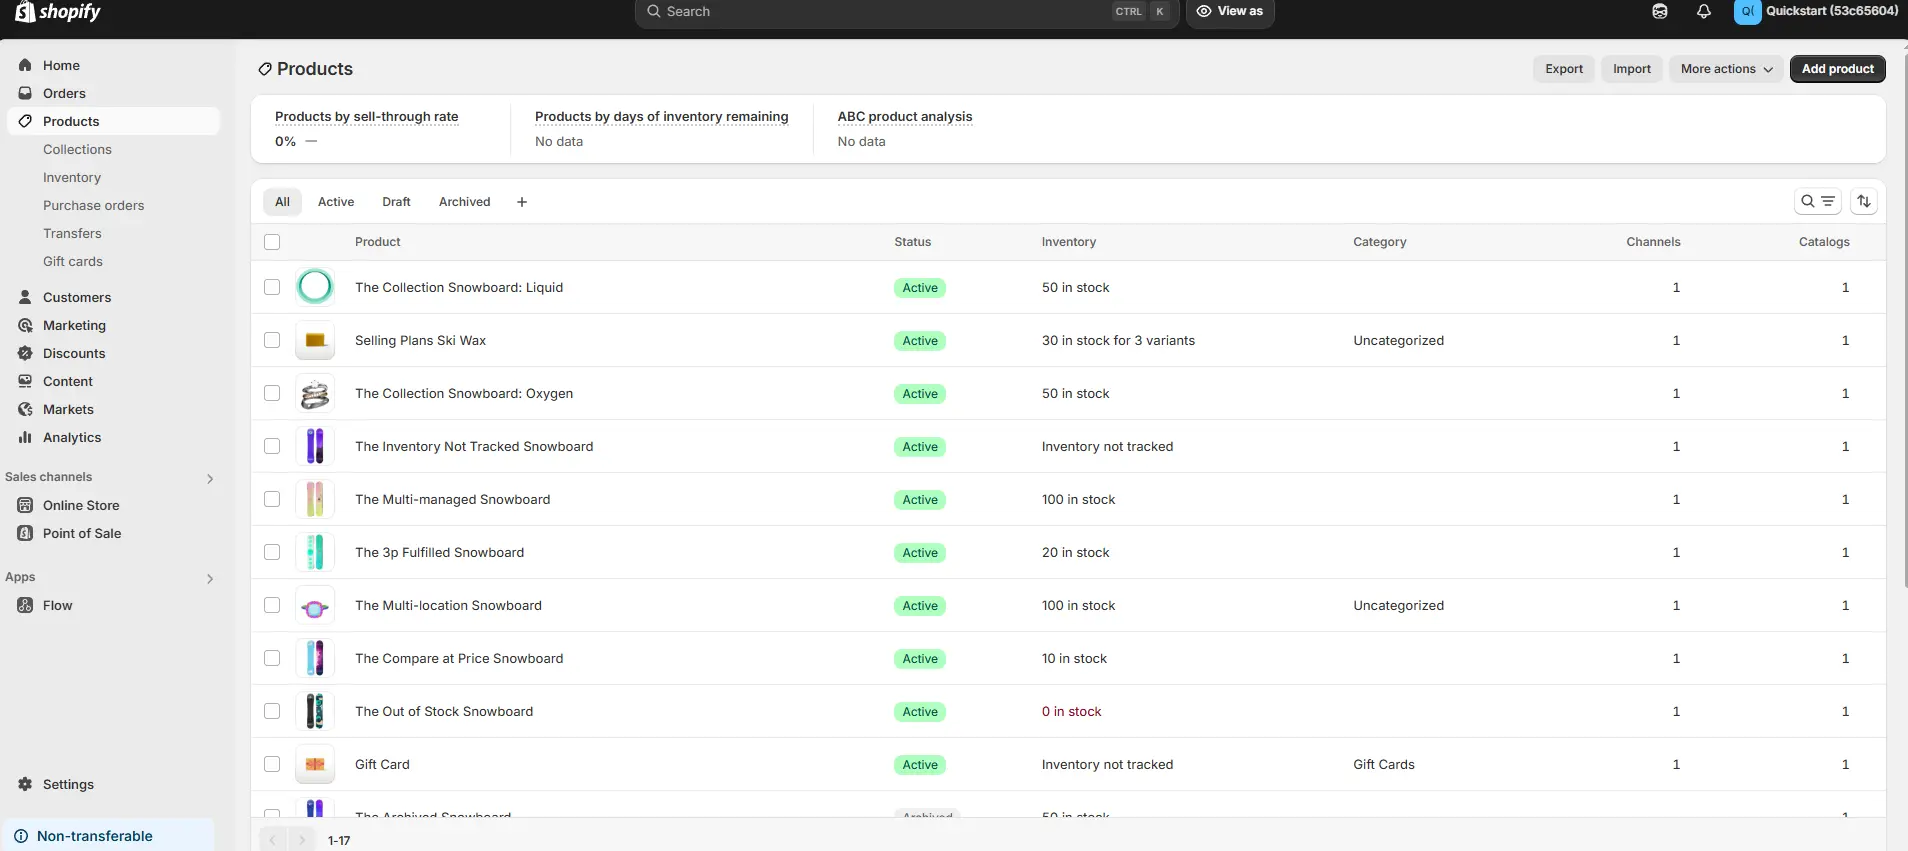
- From your Shopify admin dashboard, click on Products
- Click on the product you want to display the embedded iJewel model on
- On the product edit page, scroll all the way down until you see the Metafields section
- Click into the input field next to "iJewel Embedding Model Source"
- Enter your embed source URL from Step 3
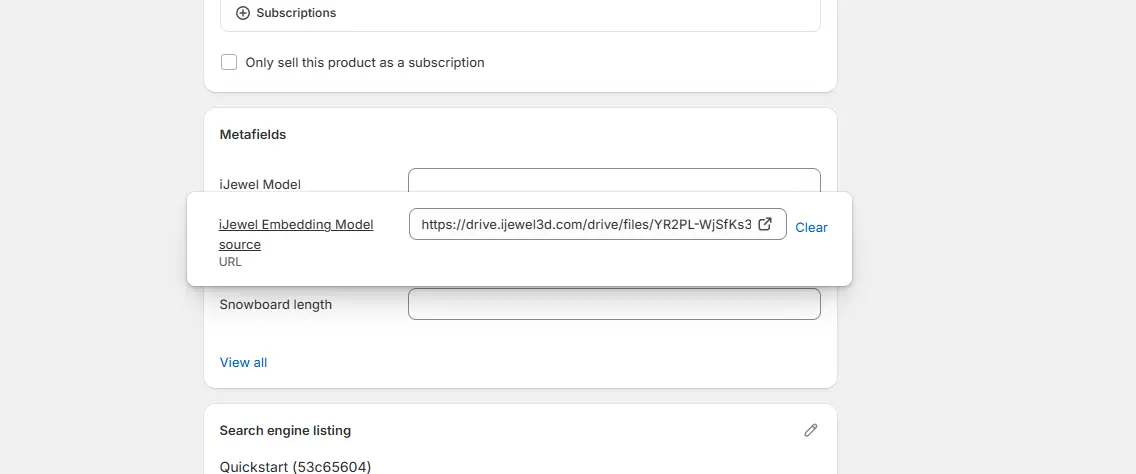
- Save the Product
Step 5: Locate the product page and it's corresponding File
- In Shopify admin, navigate to: Online Store → Themes → Actions → Edit Code
- Open the Sections folder
- Find and click on main-product.liquid
Step 6: Add iFrame Embed
Add the following code in in main-product.liquid
{% if product.metafields.custom.model_source_embed %}
  <div class="page-width" style="margin-top: 20px; text-align: center;">
    <iframe
      src="{{ product.metafields.custom.model_source_embed }}"
      width="100%" height="500px"
      frameborder="0"
      allow="autoplay; fullscreen; xr-spatial-tracking; web-share"
      allowfullscreen
      mozallowfullscreen="true"
      webkitallowfullscreen="true"
      xr-spatial-tracking
      execution-while-out-of-viewport
      execution-while-not-rendered
      web-share
    ></iframe>
  </div>
{% endif %}
Step 7: Test the Integration
- Preview the product page with the 3D model and the theme
- Verify that the iJewel viewer loads correctly and functions as expected
- Test on various devices and browsers to ensure compatibility
Troubleshooting
- If the viewer doesn't appear, check the browser console for JavaScript errors
- Ensure all file paths are correct in your theme files
- Verify that the 3D model file is in a supported format (GLB or GLTF)
Next Steps
- Check out other products at iJewel3D
Remember to thoroughly test your changes before pushing the updated theme live. Regularly check for updates to both the Shopify theme and the iJewel SDK to ensure compatibility and access to new features.
Contact
For any questions or assistance with the integration, or questions about the license, email us at contact@ijewel3d.com,